Create Polaroid Icon + Customize Folder Icon
Create a Polaroid Icon
To create a Polaroid icon follow these steps:
1. Create a new image using the "File/New/New Image..." menu item. This will open the New image dialog. Select 256x256 as size and transparent background.

New Image Dialog
2. Open the Explorer panel using the "Window/Toolbar and Panels/Explorer" menu item. On the Explorer panel press the home button to go to the folder where the image objects are located. Then drag the Polaroid image object to the image.
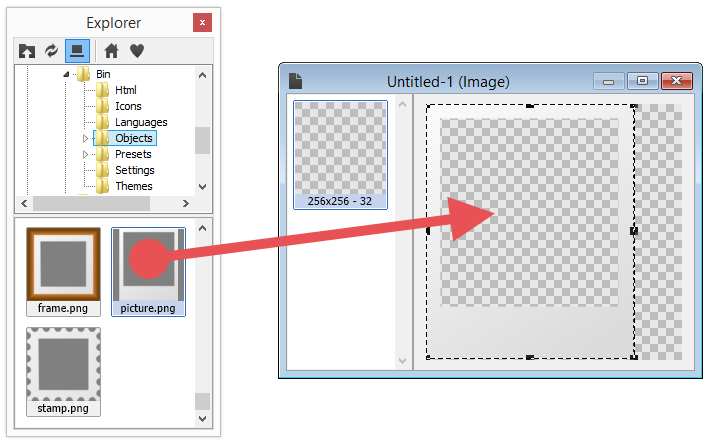
Drag from the Explorer panel to the image
3. Using the move tool resize the image frame and position it to the center.

Resize and center the image
4. Deselect the image using Ctrl+D. Open the image that will be the content of our Polaroid picture using the "Image/Import Image" menu item. The image will be opened in a new layer. Move the new layer to the bottom by dragging it on the sidebar.
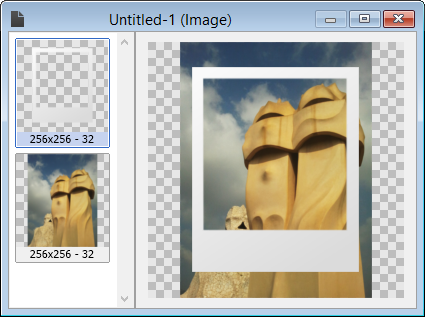
Import the image
5. Using the Move tool position the image the way you'd like to show up on the frame. Deselect the image using Ctrl+D. Using the rectangle tool draw a rectangle on the Polaroid frame.
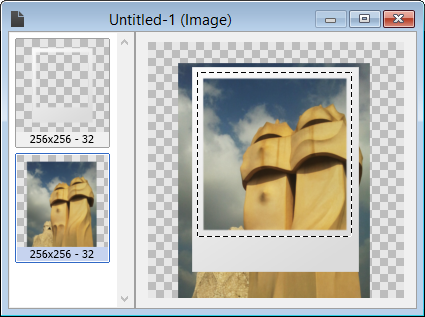
Position the image
6. Now we will remove the unneeded part of the image. Invert the selection using "Edit/Invert Selection" menu item. Make sure that the layer with the image is selected. Delete the selection using the "Edit/Delete" menu item.
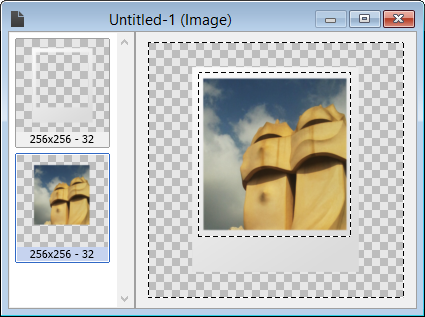
Remove the extra part of the image
7. We flatten the image by pressing the flatten button on the layer panel. After this the two layers will be merged into a single layer.
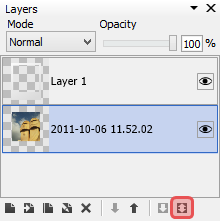
Flatten the image
8. We add a shadow using the "Adjustments/Shadow" menu item. This will open the Shadow dialog.
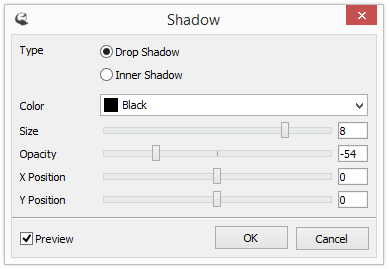
Add a shadow to the image
9. To create a stack effect we duplicate the image layer by pressing the duplicate button on the layers panel.

Duplicate Layer
10. Rotate the top layer 10 degree to the right using the Rotate dialog. Open the Rotate dialog using the "Adjustments/Rotate/Flip/Rotate" menu item.

Rotate dialog
11. Create an icon from our image using the "Window Icon From Image" dialog. Open this dialog using the "Image/Create Window Icon From Image" menu item. This dialog will add all the needed image formats to your icon. Once the icon is ready save it using the "File/Save" menu item.

Window Icon From Image
↑ Top of PageContent
Customize Folder Icon
Now that out icon is done we can customize a folder using the newly created icon.
Open the Icon Customization dialog using the "Tools/Icon Customization" menu item. On this dialog select the folder that you'd like to customize and select our icon by pressing the "Change Icon" button.

Customize folder icon
Now the folder looks like this on the desktop:

Customized folder
↑ Top of PageContent